Windows
If your computer is in the OASIS domain of UCLouvain and if you are a member of the imp-sise-ricoh-inma group, the printer is installed automatically. In other cases, follow the steps below.
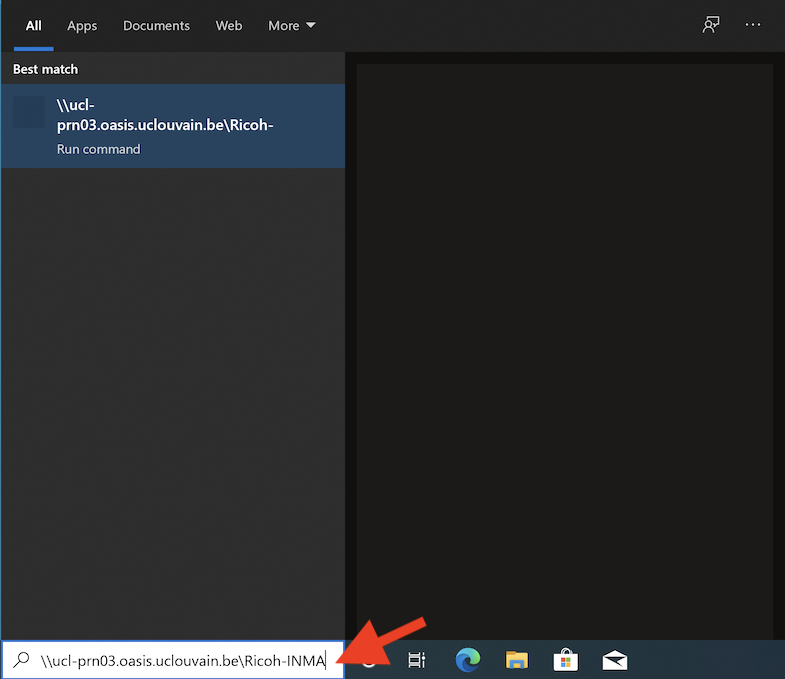
- In the Windows 10 search bar, type \\ucl-prn03.oasis.uclouvain.be\Ricoh-INMA.
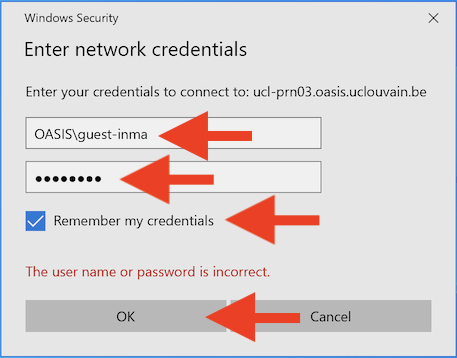
- Authenticate yourself. The name is OASIS\your_UCLouvain_global_ID and the password is the one associated with this identifier. If you do not have a global UCLouvain identifier, the name is OASIS\guest-inma and the password is the one you have been given. Choose to remember your credentials.
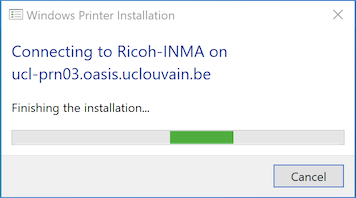
- Wait, the driver is downloaded…
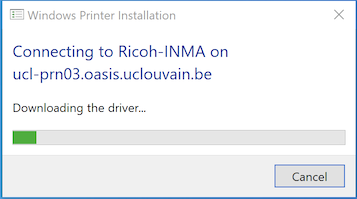
- … and installed.
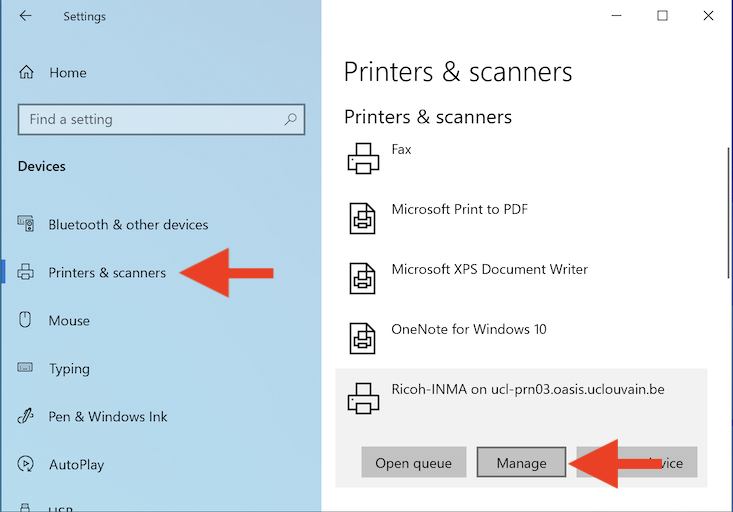
- To date, we use a personal user code as an additional means of protection. Without this, printing is impossible. To obtain your code, contact Pascale Premereur. Go to Settings > Devices > Printer & scanners. Select the installed printer and click Manage.
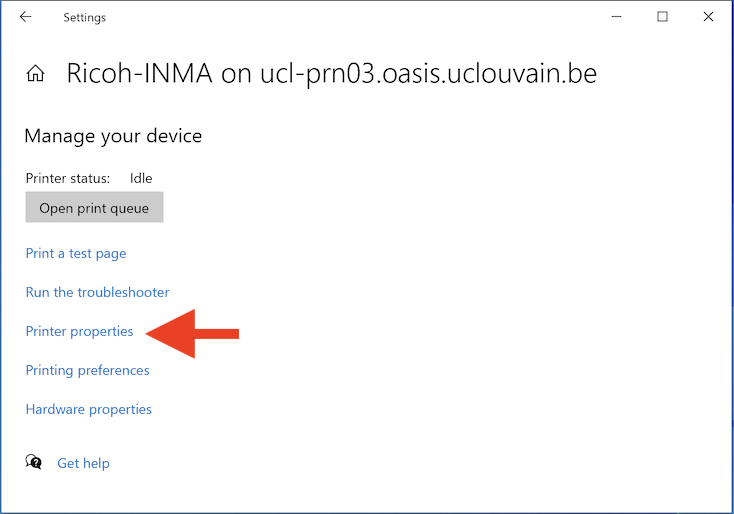
- Click on Printer properties.
- Click on User Code Setting… and write it in the field provided.
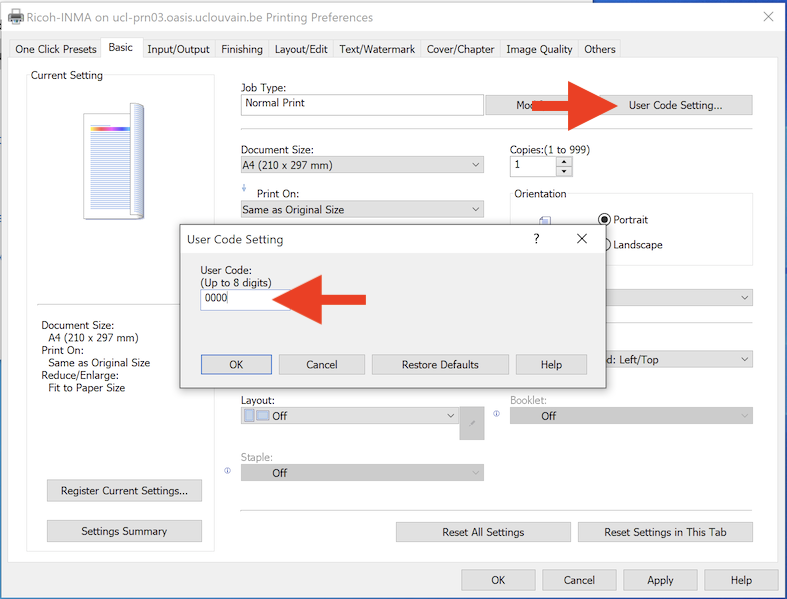
In any case, start by entering your user code as explained above.
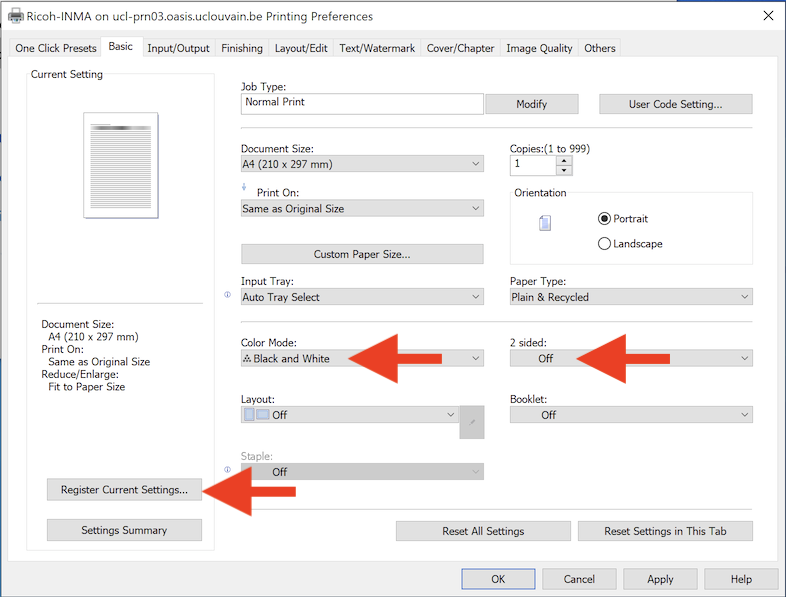
It is useful to define your own printing parameters, i.e. to specify by default: the user code, single-sided or double-sided, black and white or color. We will show how to create a single-sided black and white preset.
- For a single side black and white printing, select the Black and White color mode and disable double-sided printing. Then, click on Register Current Settings…
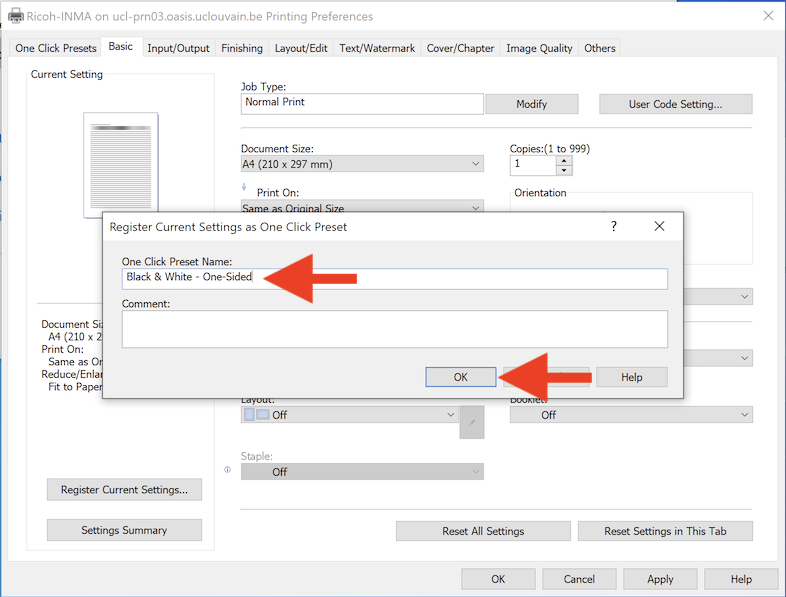
- Give your choices an explicit name and click OK.
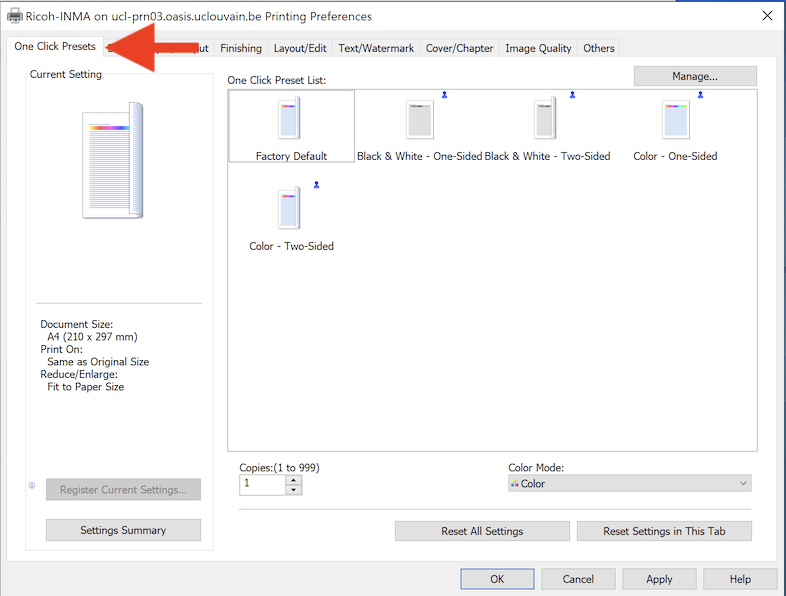
- When all presets are defined, you can view them in One Click Presets.
In Windows, some applications have their own print menu. It can be useful to find the one installed by the driver. Here is for example, how to proceed with the Edge browser.
- Click on Print using system dialogue.
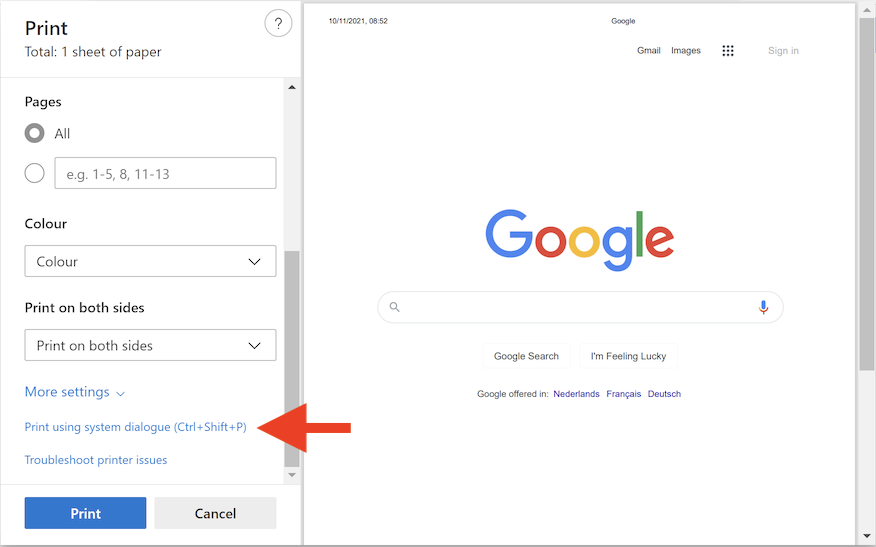
- Select the printer and click on Preferences. The correct print menu will appear.
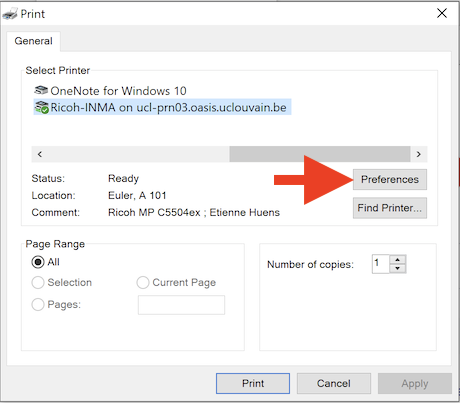
- This is a printout that only occurs when the user enters the password they have chosen for this printout on the copier console. This allows you to start printing only when you are physically present at the machine. Very practical for printing on colored paper or any confidential work such as exams.
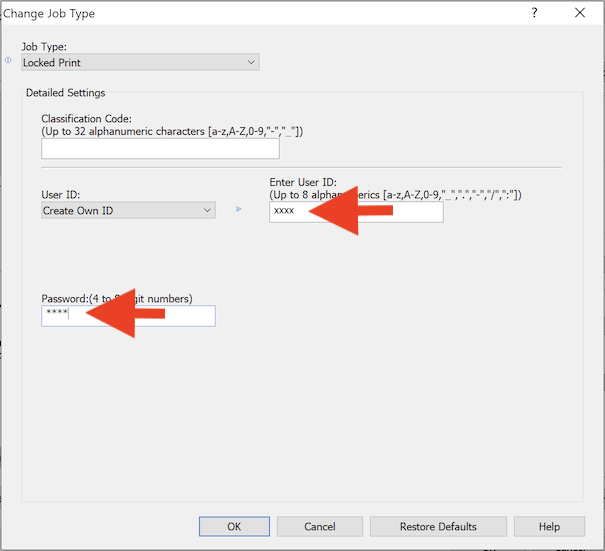
In Job Type, click on Modify and select Locked Print.
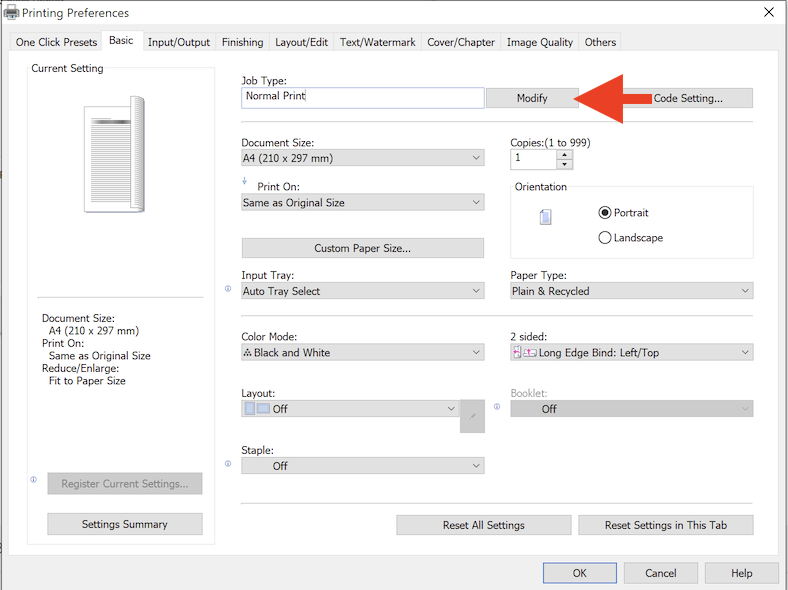
- Enter a User ID: this will allow you to find the printout on the printer console. The Password is necessary. It must be entered on the console to start printing. This Password is chosen by the user and may be different from the user code.